


Tag Archives: Shale Shaker Installation Guide
Comprehensive Shale Shaker Installation Guide for Oilfield Solids Control Systems
The shale shaker is essential for oilfield solids control—correct installation ensures stable operation, less downtime, and longer life. This guide covers proper installation steps, safety notes, and adjustments for efficient drilling fluid processing.
China-based TR Solids Control offers complete shale shaker solutions and on-site technical support for optimal performance.
1. Preparation Before Installation
Before installing the shale shaker, ensure all tools, accessories, and lifting equipment are ready. Carefully inspect the shaker body, screens, and vibration motors for any damage during transportation.TR Solids Control recommends using a reinforced steel base or skid-mounted frame for stable installation on drilling rigs or mud tanks.
2. Positioning the Shale Shaker
Place the shale shaker in the designed position above the mud tank or solids control system skid.Make sure that:
- The discharge outlet aligns with the mud tank inlet.
- The fluid flow direction matches the tank layout.
- The shaker sits horizontally with a slight incline (typically 3°–5°) toward the discharge end to ensure proper flow of drilling mud.
If multiple shakers are installed in parallel, maintain equal spacing for maintenance access and balanced mud flow.
3. Connecting the Pipeline and Electrical System
Once the shaker is in place, connect the inlet and outlet pipelines:
- The feed line should connect the flow line or mud return system to the shaker’s inlet.
- The discharge line should direct processed mud to the next tank or centrifuge feed section.
Electrical installation should be handled by certified technicians:
- Ensure the vibration motor is connected correctly to the power supply.
- Check rotation direction — the two motors must rotate in opposite directions to create linear vibration.
- Verify all cables are securely fixed and protected from mechanical damage.
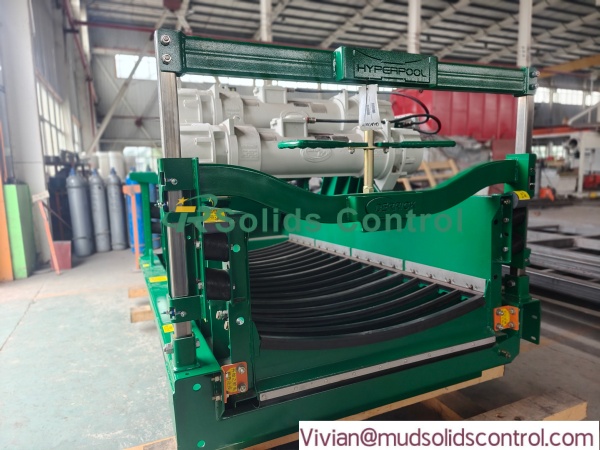
4. Installing and Tensioning Shaker Screens
Proper screen installation is crucial for optimal separation efficiency.Steps for installing shaker screens:
- Open the shaker cover or screen frame lock.
- Clean the screen bed surface to remove dust or mud.
- Place the screen panels in the correct order (coarse mesh first if multi-layered).
- Tighten the tensioning bolts or wedges evenly to ensure no gaps or loose points.
- Close and secure the screen cover.
TR Solids Control shale shakers use quick-lock screen systems, allowing operators to replace screens easily without tools, reducing downtime during drilling operations.
5. Final Checks Before Start-Up
- Inspect all fasteners, ensuring they are tightened properly.
- Confirm electrical grounding and motor insulation are secure.
- Make sure the vibration isolation pads are evenly placed under the shaker base.
- Test-run the shaker for 10–15 minutes to check for abnormal noise or excessive vibration.
If everything runs smoothly, connect the shaker to the drilling mud circulation system and begin normal operation.
Conclusion
A properly installed shale shaker is critical to the performance of the entire drilling mud system. Following this shale shaker installation guide helps operators achieve efficient solids control, reduced maintenance, and extended equipment service life.
For professional guidance, customized solutions, and reliable shale shaker equipment, contact TR Solids Control — your partner in advanced solids control and waste management systems.

